
If you need to prepare for bed bug treatment, the worst thing you can do is panic-clean in every direction at once. Bed bug prep works best when it feels boring and methodical: bag, label, dry, isolate, repeat. That’s how you make treatment easier, faster, and a lot more likely to work the first time.
What you’ll need before you start
Before you touch a closet, strip a bed, or drag out a vacuum, get your supplies together. Bed bug prep gets messy fast when you keep stopping to hunt for tape, markers, or more bags. A basic setup saves your sanity and keeps you from spreading bugs while you work.
You do not need a warehouse worth of equipment. You need a small, deliberate prep station. Set it up in or just outside the room you’re working on, based on your exterminator’s instructions. Keep clean supplies separate from anything you’ve already bagged. Think of it like packing for a move, except the goal is containment, not speed.
A simple prep kit to gather first
Start with heavy-duty trash bags or thick clear plastic bags, plus a roll of tape and a black marker. Add zip bags for small items like chargers, remotes, hair ties, or kids’ small toys. If you can get dissolvable laundry bags, great, but regular sealed laundry bags work too as long as you move them carefully.
You’ll also want a vacuum with a crevice tool, laundry detergent, access to a dryer, disposable gloves if that makes the job easier, and a notepad or phone checklist. Clear plastic bins help a lot for temporary storage because smooth plastic is less inviting than cardboard for bed bugs, and you can see what’s inside without reopening everything. If your treatment plan includes mattress or box spring encasements, buy those before treatment day so you are not scrambling later.
How to read your exterminator’s prep sheet without missing the important parts
Read the whole prep sheet once, then read it again with your actual rooms in mind. A generic checklist sounds simple until you remember the storage bed in the guest room, the crib in the nursery, the fish tank in the den, and the overstuffed hall closet that technically counts as “adjacent space.”
Mark anything that looks different in your home. If instructions say “empty nightstands,” write down which rooms have them. If the sheet says “remove bedding and leave mattress accessible,” note which beds have platform frames, loft frames, or under-bed drawers. If your home has electronics near beds, mobility equipment, medical supplies, or baby gear, flag those now and confirm the rules before treatment day.
The catch is that pest prep sheets are often written for the average bedroom, not your exact layout. So translate the sheet into a room-by-room plan. That’s what keeps important details from slipping through the cracks.
How much time to set aside and who needs to help
Set aside more time than you think. A lightly cluttered bedroom may take a few hours. A crowded primary bedroom with a packed closet, under-bed bins, and laundry everywhere can eat half a day by itself. Closets, fabric-heavy rooms, and children’s rooms usually take the longest.
If more than one person lives in the home, assign simple jobs instead of having everybody hover over the same pile. One person bags fabrics. Another labels. Another runs laundry and keeps clean items sealed. Kids can help sort washable stuffed items or gather shoes into one area if they are old enough to follow instructions.
Prep feels smaller when you shrink the mission. One room. One category. One bag at a time.

Before Step 1: Confirm your treatment plan and ask the right questions
Bed bug prep changes depending on the treatment method. That matters more than most people expect. Heat prep is not identical to chemical prep, and combination plans often have their own rules. If you skip this step, you can do hours of work and still miss something important.
A lot of treatment failure starts with mismatched prep. Public health guidance keeps repeating the same point: successful control depends on several control methods, not a single spray or one dramatic cleaning day. So get specific before you start.
Ask what type of treatment you’re getting
Ask plainly whether your service is heat, conventional insecticide, steam, or a combination. Heat treatments often require extra attention to candles, cosmetics, medications, vinyl items, electronics, and anything else sensitive to high temperatures. Conventional treatments may involve more detailed instructions about reentry time, open drawers, accessible baseboards, and when not to clean afterward.
If you are still comparing options, it helps to understand how treatment methods differ before prep starts. The right prep follows the method, not the other way around.
Ask what must be removed, unplugged, opened, or left in place
Some items need to be bagged. Some need to be left exactly where they are. Some should be unplugged. Some drawers should be emptied, while others should stay in place and be left open. This is where people get tripped up.
Ask for a plain list: what leaves the room, what stays in the room, what gets opened, what gets sealed, and what absolutely should not be moved to another part of the home. That last one matters a lot. Carrying unbagged items from an infested bedroom into a hallway or living room is one of the easiest ways to spread bed bugs.
Tell the company about allergies, asthma, pets, fish tanks, and medical needs
Bring up anything that affects safety or timing. That includes asthma, chemical sensitivities, pregnancy, service animals, aquariums, reptiles, medications that need refrigeration, and any health issue that makes long reentry windows difficult. If you need to return sooner for medical reasons, say so before treatment day, not while the technician is at the door.
The same goes for babies, kids’ sleep spaces, and pet areas. Bed bug prep is never just about killing bugs. It is also about getting your household back in safely.
Get the treatment-day timeline in writing
Get the arrival window, how long treatment will take, when you can come back, and whether follow-up visits are already expected. Many infestations need two to four visits, so one appointment is often the start of the process, not the finish line.
Written timing saves you from the classic 9:30 p.m. panic, when you suddenly realize nobody knows where the dog is going, which bags stay sealed, or whether you can sleep at home that night.
Step 1: Start with containment so you don’t spread bed bugs while prepping
If you remember one principle, make it this one: contain first, sort second. Bed bugs are great hitchhikers. Prep that spreads bugs into new rooms is not prep, it is relocation.
Work one room at a time, starting with sleeping areas
Start with the room where bites, sightings, or signs are strongest, usually the main sleeping area. Bedrooms come first because beds, nightstands, baseboards, nearby seating, and closet piles are the highest-value hiding areas. Bed bugs do not stay politely on the mattress, but sleeping spaces are still the center of the problem.
Working one room at a time keeps you from carrying bugs down the hall like glitter that somehow shows up three days later in the bathroom. Finish containing one room before jumping to the next.
Keep items in the same room unless your prep sheet says otherwise
Do not drag baskets of clothes, stacks of books, or mystery piles into a “clean” guest room while you sort. That usually backfires. EPA guidance is clear that reducing clutter should happen without moving items from an infested area into a non-infested one, because that is a simple way to spread the infestation.
Keep items in the room while you bag and sort them unless your pest company specifically tells you to move sealed items to laundry, trash, or a designated treatment area. If an item is staying in the home, it usually stays in that room until it has been treated, sealed, or inspected.
Bag before you move anything
Before anything leaves the room, it goes into a sealed bag. Clothing, linens, curtains, stuffed animals, soft bins, tote bags, and anything fabric-heavy should be contained first. Seal the bag tightly before carrying it to the laundry area.
This order matters. Not sort, then carry, then bag. Bag, seal, then move. That one habit does a lot of work.
Label every bag: washed, dried, needs treatment, or don’t open yet
Labeling sounds fussy until you have twelve black bags lined up in the hallway and no memory of which ones are clean. Use a simple system and stick to it. “Needs dryer.” “Clean and sealed.” “Trash.” “Shoes, inspect.” “Do not open yet.”
The trick is to label before the bag leaves your hand. Bed bug prep is tiring, and memory gets sloppy fast. A marker saves you from undoing your own work.
Step 2: Declutter the room without creating new hiding spots
Clutter is not just annoying here. It gives bed bugs more cracks, folds, shadows, and surfaces to hide in. The cleaner and more accessible the room is, the better treatment can reach seams, joints, floor edges, and furniture gaps.
Pick up floors, under-bed areas, and closet piles first
Start with the stuff touching the floor. Shoes, loose laundry, grocery bags, backpacks, paper stacks, cords, and under-bed storage all create hiding spots and block access. Under-bed zones are especially bad because they are dark, packed, and rarely disturbed.
Clear the obvious piles first. That gives you room to move and makes everything else easier.
Sort clutter into keep, treat, trash, and inspect
Do not invent ten categories. Use four. Keep means hard items that are clean or clearly not a concern. Treat means fabrics or belongings that need heat, inspection, isolation, or professional guidance. Trash means items that are truly disposable. Inspect means anything small, mixed, delicate, or easy to forget.
This system keeps decision-making from swallowing your whole day. If you stand over every random phone charger and old receipt like it is a life event, prep stalls out.
Replace cardboard storage with sealed plastic bins when possible
Cardboard is bad news for bed bug prep. It has seams, layers, and texture that make inspection harder and hiding easier. If you can swap cardboard boxes for sealed clear bins, do it. You will see contents faster, stack them better, and avoid reusing a hiding place you can’t really inspect.
Rutgers specifically points to plastic containers as a practical prep tool. They are not magic, but they are easier to manage than paperboard boxes and sagging shopping bags.
How to throw things away without spreading bugs
If you throw something out, bag it first. Seal it. Label it if needed. Then take it straight to the outside trash, not the hall closet, not the garage floor, not “just by the door for now.” If a furniture item is too infested or damaged to save, make it obviously unusable before disposal so nobody drags it home from the curb.
Throwing away items can help in some cases, but panic-discarding usually just creates expense and stress. Save what can be treated. Discard only what makes sense.
Step 3: Strip, bag, and heat-treat all washable fabrics
This is one of the highest-impact steps in the whole process. Done right, it knocks down a big chunk of the problem on items you use every day. Done halfway, it creates a confusing mountain of almost-clean fabric.
Strip beds completely
Take off sheets, pillowcases, blankets, comforters, mattress pads, bed skirts, and any washable fabric that hangs from or touches the bed. Bag everything before it leaves the room.
Do the same for throw blankets or decorative pillows if they live on the bed. If fabric has been near sleeping areas, treat it as part of the job.
Include clothing, curtains, soft toys, and nearby fabric items
Look beyond the bed. Bed bugs can hide in curtains, hampers, laundry baskets, robes, hoodies tossed over chairs, soft toys, scarves, tote bags, and the hoodie hanging off the doorknob. If it is washable and has been in or near an affected room, put it in the treatment pile unless your pest company says otherwise.
A lot of people miss the chair in the corner. Don’t miss the chair in the corner.
Use the dryer on high heat for at least 30 minutes
For dryer-safe items, high heat in the dryer for at least 30 minutes is one of the most reliable prep steps. The dryer heat is what kills bed bugs and eggs on washable fabrics. That is the part doing the real work.
If items are already clean, you may not even need to wash first. Drying can come first if that fits your instructions and fabric type. The point is heat.
Wash if needed, but don’t skip the hot dryer step
Washing removes dirt and stains. The dryer kills. That distinction matters. People often assume a hot wash alone solved it, then toss damp items into a basket and accidentally keep the problem going.
If something needs washing, wash it. Then dry it on high heat. If it does not need washing but can safely handle high dryer heat, the dryer may be enough for the bed bug part.
If you want a deeper breakdown of why heat matters so much, it helps to read about what it takes to kill eggs, because that is where shortcuts usually fail.
Store clean items in sealed bags or bins until after treatment
Once an item has gone through the dryer, it does not go back into an open hamper or onto the treated bed “just for tonight.” Put it straight into a clean sealed bag or bin and label it.
This feels annoying, but it protects your progress. Clean items stay clean only if you keep them separate from anything untreated or mixed.

Step 4: Prepare the bed, mattress, and box spring for treatment
The bed is usually the main stage, so give it real attention. You want your pest professional to see seams, joints, tufts, tags, and frame connections clearly. You also want the bed easier to monitor after treatment.
Pull the bed at least 6 inches from the wall
Move the bed away from the wall by at least 6 inches. EPA guidance specifically recommends this distance because it helps reduce easy access and makes inspection and treatment easier.
Once the bed is off the wall, make sure bedding will not touch the floor later. You are setting up for isolation, not just inspection.
Remove and bag bedding, then leave the mattress and box spring accessible
After bedding is bagged, leave the mattress and box spring exposed according to your prep sheet. Some companies want them standing or angled for access. Others want them left on the frame but fully visible. Follow those instructions exactly.
The point is to expose edges, seams, labels, staples, corners, and the box spring structure. Bed bugs love those spots.
Install encasements if your treatment plan calls for them
Encasements zip around the mattress or box spring and trap any bugs already inside while also removing a bunch of future hiding places. Look for a full zipper closure that seals completely and is durable enough to stay on long term. Public health guidance often recommends leaving encasements on for a year.
They are worth using when part of the plan. In fact, encasing them is often better than throwing mattresses or box springs away.
Make the bed an island after treatment
After treatment, keep the bed from touching walls, curtains, furniture, or piles of anything. Tuck bedding so it does not brush the floor. Skip bed skirts that reach down like little fabric ladders.
The bed should stand alone. That is what “make the bed an island” really means. It sounds dramatic, but it works.
Add interceptors under bed legs for monitoring
Interceptors are small traps that sit under bed legs and catch bed bugs trying to climb up or down. They are simple, cheap, and genuinely useful. EPA recommends checking them daily at first, then continuing to monitor long term.
If you want to know whether treatment is working, these traps tell a clearer story than anxious late-night flashlight checks.

Step 5: Vacuum the right places and handle the vacuum safely
Vacuuming helps, but only when you do it with a plan. It reduces visible bugs, cast skins, and debris, and it makes inspection easier. It does not finish the job by itself.
Focus on seams, tufts, bed frames, baseboards, and floor edges
Use the vacuum on mattress seams if your prep instructions allow it, box spring edges, bed frame joints, baseboards, carpet edges, around bed legs, and upholstered seams. Hit the room perimeter carefully, especially where the floor meets the wall.
Think tight, hidden, and dusty. That is where vacuuming earns its keep.
Use crevice tools for cracks and joints
Use the crevice attachment, not the wide open floor head, for frame joints, furniture cracks, trim gaps, and seams. Bed bugs love narrow spaces because those spaces let them press close to surfaces and stay hidden during the day.
Slow down here. Fast vacuuming misses the exact spots that matter most.
Seal and discard vacuum contents right away
This part is non-negotiable. Once you finish, seal and discard the vacuum bag or empty the canister into a plastic bag, seal it, and take it outside immediately. Then clean the vacuum and attachments.
Public health sources warn that vacuums can spread infestations if you ignore the cleanup step. The vacuum is a tool, not storage.
Don’t count on vacuuming alone to solve the problem
Vacuuming reduces numbers. It does not reliably remove every egg, and it does not replace treatment. Eggs can stick to surfaces, and bugs stay hidden in places your vacuum will never reach.
Use vacuuming as support, not the whole plan.

Step 6: Open up hiding spots so treatment can reach them
Bed bugs hide where pressure, darkness, and tiny gaps meet. If those spots stay blocked, treatment gets blocked too. Your job here is access, not demolition.
Empty and prepare nightstands, dressers, and drawers near the bed
Start with furniture closest to sleeping areas. Remove contents as instructed, bag what needs treatment, and leave drawers open if your pest company says to. Nightstands often hold books, chargers, tissues, medications, and random clutter that can hide bugs without looking suspicious.
Dressers are trickier because clothing mixes clean and dirty fast. Bag items by category and label them before moving anything to the laundry.
Move furniture slightly away from walls if instructed
If the prep sheet tells you to move furniture, pull it out enough to expose baseboards and rear edges. Do not drag pieces into hallways or other rooms. The goal is access, not relocation.
This is also a good time to review which prep tasks matter most if you feel like you are drowning in details. Access to wall edges and furniture backs is always high on the list.
Loosen outlet covers or wall hangings only if your pest company says to
Bed bugs can hide in tiny gaps around outlet covers, switch plates, picture frames, and wall hardware. But not every treatment plan needs you to start unscrewing things. Only do this if your pest company specifically tells you to.
That is especially true with steam, dusts, or anything near electrical areas. Extra effort is not always better effort.
Expose baseboards, closet edges, and under-furniture areas
Pull stored items back from walls, clear closet floors, and expose under-furniture corners. If bed bugs are in the room, baseboard lines and hidden edges deserve attention. Some public health guidance notes inspection should extend to hiding places within about 20 feet of beds or couches, which is wider than many people expect.
In plain English: don’t stop at the mattress.
Step 7: Handle shoes, books, electronics, and small personal items the smart way
These are the items that create last-minute panic because they cannot all go into the dryer. Some can be inspected and bagged. Some need isolation. Some need alternative treatment.
Sort shoes, bags, backpacks, and luggage
Inspect seams, pockets, zippers, folds, and bottoms. Shoes and bags travel, which makes them easy hitchhiking tools. Bag them after inspection. If your treatment plan allows heat chambers, freezing, or isolation, sort items accordingly.
This matters for school bags, work bags, diaper bags, gym bags, and luggage stored under beds. Bed bugs do not care that you only used that suitcase once last summer.
What to do with books, papers, and important documents
Reduce paper clutter, but do not speed-run valuable paperwork into the trash because you are stressed. Books and paper stacks can provide hiding spots, especially near the bed or on the floor. For items you need to keep but cannot heat, seal them in bins or bags for inspection, isolation, or alternative treatment.
Important documents deserve their own clearly labeled sealed container. Keeping them organized now prevents a miserable search later when you need your passport or insurance card.
How to prepare laptops, alarm clocks, and other electronics
Do not spray electronics. Do not soak them. Do not improvise with hair dryers. Unplug items if instructed, inspect outer seams and vents, and ask your pest company how electronics should be handled. Some may stay in place for inspection. Others may need isolation or heat-safe specialty treatment.
Alarm clocks, charging stations, lamps near the bed, game systems, and extension cords are easy to ignore because they are not soft. But bugs can still hide in nearby cracks and protected openings.
Items that may need freezing, isolation, or professional specialty treatment
Some items cannot be laundered and should not be heated in a normal dryer. Small non-washables can sometimes be frozen if your pest company approves. Rutgers notes that household-freezer prep can work for certain items if kept at 0°F for about four days.
Other belongings may need sealed isolation for a long stretch, or specialty heat treatment. If you are considering when heat is worth paying for, this is often the category that pushes the decision, because delicate, mixed, or non-washable items are where standard prep gets harder.
Step 8: Prepare couches, chairs, cribs, and other furniture beyond the bed
Bed bugs do not stop at mattresses. If you nap on the couch, read in an upholstered chair every night, or keep piles of fabric in another room, those places belong in your prep plan too.
Inspect and prep upholstered furniture
Remove cushions if possible. Inspect seams, zippers, piping, tags, and the underside. If your couch has a thin fabric dust cover stapled underneath, your exterminator may want access there. Follow the prep sheet before removing anything.
Vacuum seams and creases carefully, and clear blankets, throws, and nearby clutter. Upholstered furniture is one of the most common “secondary” hiding spots after the bed.
Prepare kids’ rooms, cribs, and stuffed items carefully
Children’s rooms often have the most fabric and the most hiding places. Launder soft toys if safe, bag and dry blankets, and clear clutter from crib areas, under beds, and around upholstered pieces. Follow any instructions specific to sleep spaces for babies and young children.
Be extra careful with what goes back into the room after treatment. A freshly dried stuffed animal in a sealed bag is your friend.
Don’t forget recliners, benches, and guest room furniture
Recliners are a classic miss because they have folds, seams, and mechanical joints. Benches with fabric tops, daybeds, guest room headboards, and the “nobody really sleeps there” sofa bed can all hold activity.
The quiet room still counts if somebody rests there. Bed bugs follow sleeping and sitting patterns, not your official room labels.
Step 9: Protect pets, fish tanks, plants, and sensitive household items
Treatment day gets stressful fast when living things and fragile belongings are still an open question. Handle this early so you are not figuring out fish tank covers while the technician is on the porch.
Make a plan for pets and pet bedding
Pets need to be out of treated areas as instructed. Arrange where cats, dogs, birds, or small animals will stay during treatment and the reentry window. Wash and dry pet bedding if your exterminator says to, then keep it sealed until it is safe to bring back.
Also, avoid carrying untreated pet beds into a car or another home. Soft pet items can move bugs just like blankets and laundry can.
Special care for aquariums and terrariums
Ask for exact instructions for tanks. Aquariums often need special handling because of air pumps, covers, and the difficulty of moving them safely. Some setups need pumps turned off temporarily or sealed differently during treatment. Heat treatment can create separate concerns because fish and reptiles are not exactly forgiving roommates when temperatures swing.
This is not a same-morning task. Confirm the plan early.
Remove or protect food, dishes, medicines, and personal care items if required
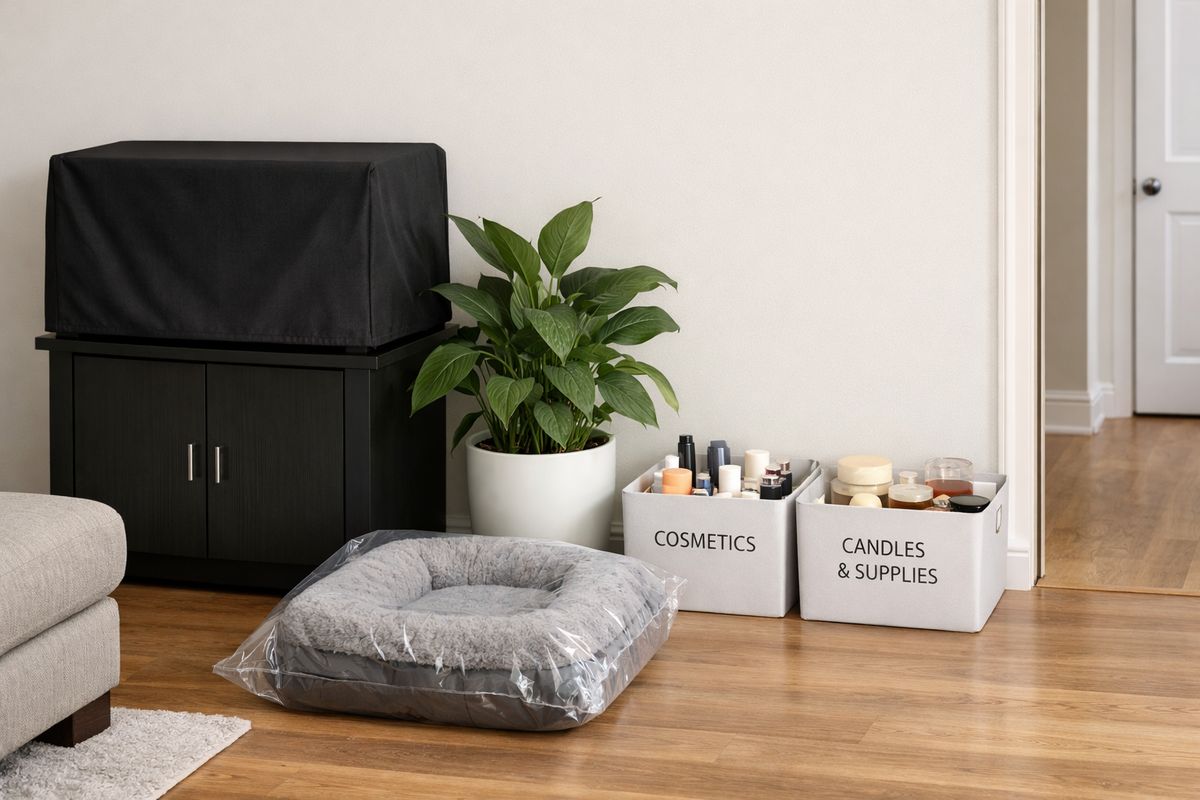
Some treatment plans call for sealing or removing exposed food, dishes, toothbrushes, medications, cosmetics, or personal care items. Others do not. Follow your company’s instructions exactly here.
Put these items in clearly labeled bins or bags so you are not hunting for a toothbrush and blood pressure medication while standing outside after treatment.
Plan for houseplants and temperature-sensitive belongings
Houseplants, candles, wax melts, vinyl records, certain cosmetics, aerosols, medications, and some adhesives can all be sensitive to treatment conditions, especially heat. Ask what should leave, what can stay, and what needs special placement.
This is also the right time to think about sentimental items. If something is delicate and irreplaceable, flag it before treatment day.
Step 10: Prepare shared walls, nearby rooms, and apartment-specific concerns
Attached housing changes the job. In apartments, duplexes, condos, and townhomes, bed bugs can move through shared walls and surrounding spaces more easily than most people expect.
Tell building management and follow any unit-wide instructions
If you rent or live in a managed building, report the issue and follow the property’s process. Coordination matters. One untreated unit can keep the problem alive. That is especially true if activity has likely spread beyond one room.
If you are still at the stage of confirming the problem, it helps to review when it makes sense to bring in a pro, because waiting too long in shared housing can make everybody’s problem bigger.
Prep adjacent bedrooms, living rooms, and hall closets
Do not stop at the room where bites first showed up if signs suggest spread. Adjacent bedrooms, nearby couches, hall closets, and rooms sharing walls with sleeping areas should be checked and prepped as instructed. Bed bugs can turn up far beyond the obvious zone, and many people simply miss that because they assume “bed” is the whole story.
A survey found only 34% know bed bugs can be found outside bedrooms. That blind spot causes a lot of repeat problems.
Avoid borrowing, lending, or moving items between units
Do not loan a vacuum, carry clothing to a neighbor’s machine in open baskets, or move “temporary” furniture into a cousin’s place while treatment is underway. Keep belongings contained inside your prep system until you are cleared.
Everyday habits spread infestations faster than dramatic ones. The casual borrow-and-return stuff is often the issue.
Step 11: Double-check treatment-day access and leave the home ready
By this point, you are probably tired of looking at plastic bags. Fair enough. But the final walkthrough matters because it decides whether treatment starts smoothly or gets delayed by little misses.
Make sure all target rooms are accessible
Clear walking paths. Unlock doors. Move piles blocking closets, baseboards, bed edges, or furniture backs. If the technician cannot reach the target areas, those areas do not get treated properly.
This includes laundry piles in corners, shoe piles in closets, and “just for now” bags parked in front of dressers. The home does not need to look perfect. It needs to be workable.
Open drawers or bag items exactly as instructed
Do one last pass against the prep sheet. Open what should be open. Leave closed what should stay closed. Bag what still needs bagging. Do not improvise because you are tired.
This is where precise instructions beat guesses every time.
Set aside clean clothes and essentials for reentry
Pack a small sealed set of basics before treatment day: clean clothes, medications, chargers, keys, wallet, pet essentials, and toiletries if allowed. Keep these items separate from mixed laundry and untreated bags.
A simple “reentry bag” saves you from ripping open three labeled bags at 8 p.m. because you forgot socks.
Arrange where you’ll stay during treatment and reentry time
Know where you are going and for how long. Some services require you to be out for hours, and schedules can slide. Plan for kids, pets, meals, work calls, and transportation ahead of time.
That sounds obvious until treatment day lands on a Tuesday, school pickup is at 3:10, the cat carrier is still in the attic, and you realize your only clean shirt is sealed in a bag marked “don’t open.”
Step 12: Know what to expect right after treatment
A lot of good prep gets undone after treatment because people either clean too aggressively or unpack too soon. The first few days matter almost as much as prep day.
Follow reentry instructions exactly
Return only when your pest company says it is safe. If there is a drying time, ventilation step, or waiting period, follow it. Do not shorten it because the room “seems fine.”
Once back inside, start with the basics: ventilation if instructed, sleeping setup, and your sealed clean essentials.
Don’t rush to unpack everything
Keep treated and cleaned items sealed until your exterminator says it is time to return them to normal storage. If you unpack too early into a room that is still being monitored, you can create new hiding spots and muddy the results.
Sealed storage is annoying, but temporary annoyance beats doing this twice.
Keep sleeping in the treated sleeping area unless told otherwise
This surprises a lot of people. Moving to the couch can pull surviving bugs into a new room. If your pest company says to keep sleeping in the treated room, do that. Bed bugs are drawn to people, and treatment plans often rely on keeping activity centered where monitoring and residual control are in place.
Stick with the plan even if it feels counterintuitive.
Expect follow-up visits and continued monitoring
One treatment does not always finish the job. Eggs hatch. Hidden bugs survive. Follow-up visits, interceptors, and repeated inspections are normal. EPA guidance recommends ongoing checks every several days at first, then at least weekly.
This is also why a clear price breakdown for treatment matters early on. The full cost is often about the whole plan, not one visit.
What not to do while you prepare for bed bug treatment
Some mistakes waste time. Some spread bugs. Some create safety problems. These are the ones to avoid.
Don’t use foggers, bug bombs, or random store sprays
Foggers and bug bombs are a bad idea for bed bugs. Hidden bugs in cracks and crevices usually escape the parts that reach open air, and these products can interfere with professional treatment. Public health agencies also warn that space sprays can create fire and explosion hazards.
If it sounds like a shortcut in a can, skip it.
Don’t spray rubbing alcohol, essential oils, or DIY mixes on beds and furniture
Internet fixes are full of rubbing alcohol, essential oils, mystery concentrates, and homemade sprays. Most are ineffective, risky, or both. Some can stain fabrics. Some are flammable. Some just drive bugs deeper into hiding.
Fast-looking fixes are often the most expensive detour.
Don’t move infested furniture to another room
Getting the chair “out of the bedroom” does not solve anything if the chair still has bed bugs in it. Moving furniture around the house can spread the infestation to new spaces, hallways, or adjoining units.
Leave furniture in place unless your pest company says otherwise.
Don’t throw away everything in a panic
Throwing out every mattress, pillow, stuffed animal, and dresser because you feel disgusted is understandable, but it usually does not solve the actual problem. Many items can be treated, sealed, or monitored. Tossing everything can leave you with a huge bill and the same infestation.
Keep the plan boring. Boring works.
Troubleshooting: common prep problems and how to fix them
Real life gets in the way. Laundry backs up. Closets are packed. Apartment hallways are shared. Here’s how to keep moving when prep gets messy.
If you’re overwhelmed and don’t know where to begin
Use a first-hour plan. For the first 15 minutes, gather bags, tape, a marker, and your vacuum. For the next 15, strip and bag the bed. For the next 15, bag loose clothing and fabrics from the floor and chair. For the last 15, label those bags and start the first dryer load.
That is enough to break the freeze. Once the sleeping area is contained, the rest feels more doable.
If you can’t finish all the laundry before treatment day
Prioritize what is closest to sleeping and sitting areas: bedding, pajamas, blankets, recently worn clothes, curtains near the bed, and soft toys in the room. Bag the rest, label it clearly, and keep it sealed until you can continue.
Do not leave “half-done” laundry open in baskets. Contained and labeled beats unfinished and exposed every time.
If you live in a small apartment with no laundry room
Bag items tightly before leaving the unit. Carry sealed loads directly to the laundry space, not in open baskets. Bring empty clean bags for treated items and seal them before you walk back. Do not sort laundry in the shared room.
This is tedious, yes. It is also how you avoid turning the hall and laundry area into part of the problem.
If clutter is severe or hoarding is part of the problem
Be honest early if the volume of belongings is too much to prep safely and thoroughly before treatment. Bed bug control depends on access. If technicians cannot reach baseboards, bed frames, furniture seams, and cluttered floor edges, treatment quality drops.
In severe cases, extra labor, a rescheduled service, or specialized cleanup support may be the better move. Delaying one appointment is frustrating. Paying for ineffective treatment because the home was not ready is worse.
If you’re renting and the responsibility is unclear
Put everything in writing. Save notices, instructions, dates, and photos. Ask who is paying for inspection, treatment, prep requirements, follow-up visits, and any unit-wide work. If building management gave instructions, keep those too.
Clarity helps when schedules slip or responsibilities get fuzzy later.
If bites continue after treatment
Do not assume instant failure. Bite reactions can be delayed, and old bites can flare up after treatment. Monitoring matters more than skin reactions alone. Check interceptors, look for fresh signs, and report what you see with dates and locations.
But do not ignore ongoing evidence either. If you keep finding live bugs, new fecal spots, or rising trap activity, call your pest company and report it clearly.
Your room-by-room bed bug prep checklist
By this point, you know the logic. Now turn it into a repeatable system. This checklist style is useful because prep gets much easier when you stop relying on memory.
Bedroom checklist
- Read your treatment instructions for that room before touching anything.
- Gather bags, tape, marker, vacuum, and bins.
- Strip the bed completely and bag all bedding.
- Bag nearby washable fabrics, including clothes, curtains, and soft toys.
- Pull the bed 6 inches from the wall if instructed.
- Clear under-bed storage and floor clutter.
- Empty and prep nightstands and dressers near the bed.
- Leave mattress and box spring accessible.
- Vacuum seams, frame joints, baseboards, and floor edges.
- Label every bag and keep clean items sealed.
Living room and upholstered furniture checklist
- Remove blankets, throws, and cushion covers for treatment.
- Inspect sofa and chair seams, cushions, folds, and undersides.
- Vacuum seams, creases, and nearby baseboards.
- Bag washable fabrics from the room.
- Inspect side tables, baskets, and floor piles.
- Check recliners, benches, and sleeper furniture.
- Keep suspicious items contained and in the same room unless instructed otherwise.
Closet and laundry checklist
- Bag clothing before moving it.
- Dry dryer-safe items on high heat for at least 30 minutes.
- Wash if needed, then return items to the dryer.
- Seal clean items in fresh bags or bins.
- Label all bags by status.
- Inspect shoes, bags, and luggage.
- Replace cardboard storage with sealed plastic bins when possible.
Treatment-day final checklist
- Confirm arrival window and reentry time.
- Make sure target rooms are accessible.
- Open drawers or leave items in place exactly as instructed.
- Remove or protect pets, tanks, plants, food, and medicines if required.
- Pack a sealed reentry bag with clean clothes and essentials.
- Arrange where you will stay during treatment.
- Keep clean items sealed and untreated items contained.
- Bring your prep sheet and notes to the door so nothing gets missed.
Expected results and next steps
When you prepare for bed bug treatment properly, the home becomes easier to inspect, easier to treat, and easier to monitor afterward. That means better coverage, fewer missed hiding spots, less accidental spread, and a much cleaner picture of whether the treatment is working. It also means less chaos for you, which honestly matters just as much when you are sleeping badly and staring at labeled trash bags in the hallway.
Start with one thing this week: build your bagging system and finish one sleeping area completely. Once that room is contained, the rest of the job gets a lot less intimidating.
Frequently Asked Questions
Do you have to wash everything before bed bug treatment?
No. The dryer heat is often the part that matters most for washable items. If something is already clean and dryer-safe, your exterminator may tell you to dry it on high heat and skip the wash. Follow your specific prep sheet, but do not confuse washing with killing.
Should you sleep somewhere else before or after treatment?
Usually no, unless your pest company tells you to. Sleeping in another room or on the couch can pull bed bugs into new areas. Many treatment plans work better when you keep sleeping in the treated sleeping area after reentry is allowed.
Can you keep clothes in dresser drawers during bed bug treatment?
Sometimes, but often not in rooms near the infestation. Some companies want drawers emptied and contents bagged. Others want drawers left open for inspection or treatment. Follow the exact instructions you were given, because this varies by method and room.
How long should clean clothes stay in sealed bags?
Keep them sealed until your pest company says it is fine to unpack. That may be until after treatment day, or until follow-up confirms activity is under control. Opening clean bags too early can undo a lot of work.
Do you need to throw away your mattress if you have bed bugs?
Usually no. Many mattresses and box springs can be treated and then sealed in proper encasements. Throwing them away is often unnecessary unless they are badly damaged or your pest company says they cannot be saved.
What if you are still getting bites after treatment?
Do not judge treatment by bites alone. Skin reactions can lag behind actual activity. Check traps, inspect for fresh signs, and contact your pest company if you keep seeing live bugs, new spotting, or ongoing evidence in the same areas.