
If you suspect bed bugs, the worst first move is a frantic cleanup. Learning how to inspect for bed bugs without spreading them is really about slowing down, checking the right places and keeping anything suspicious contained from the start. By the end of this guide, you’ll know exactly what to look for, where to look first and how to leave the room without carrying the problem somewhere new.
What you’ll need before you start
A bed bug inspection goes better when you treat it like a small, controlled project, not a housewide scramble. You do not need a giant supply run, but you do need a few tools that help you see into seams, collect evidence and keep inspected items separate from clean ones.
Basic inspection tools
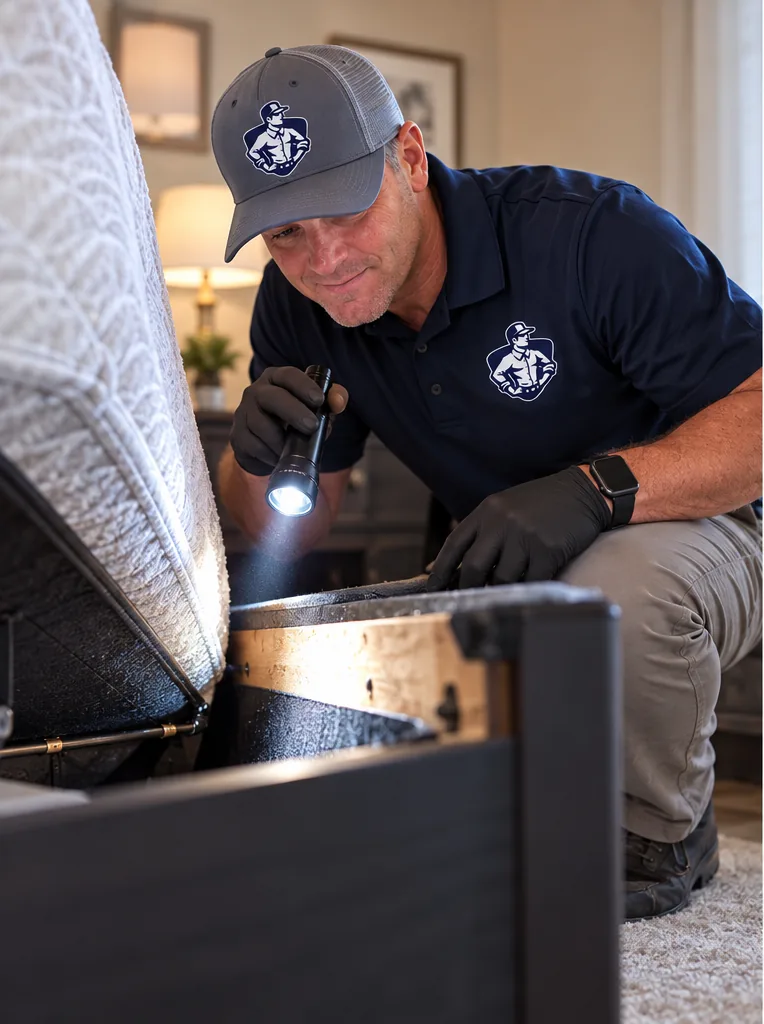
Start with a bright flashlight. Bed bugs love tight, dark hiding spots and overhead room light is usually not enough to catch eggs, shed skins or dark spotting tucked inside folds. A magnifying glass helps with the tiny stuff, especially pale eggs and young nymphs, which can be about 1/16 inch long and easy to miss.
A thin card, like an old gift card, helps you gently open seams and fabric folds without tearing anything. Keep a screwdriver nearby in case you need to loosen a headboard bracket or check a frame joint. Zip-top bags and clear tape are for collecting evidence, not for storing random clutter. If you see a bug, cast skin or suspicious debris, you can seal it right away. Gloves are optional. Some people like them because they make the process feel less stressful, but careful handling matters more than gloves. A notepad or phone is also worth having ready so you can photograph what you find and note exactly where it came from.
Simple containment supplies
Bring a few trash bags or sturdy laundry bags into the process before you begin. That way, when you remove bedding or inspect loose fabric items, you can bag them immediately instead of carrying them through the house uncovered. A hamper liner or dissolvable laundry bag can help keep laundry contained all the way to the washer.
Wear washable clothes that can go straight into a hot dryer or sealed bag afterward. Set a hard-sided plastic bin outside the room for clean items or tools that need to stay isolated. That hard shell matters. Soft baskets, fabric totes and open bins are much easier for hitchhikers to cling to.
What not to bring into the room
Leave purses, backpacks, extra laundry baskets and cardboard boxes out of the room. Soft items and clutter give bed bugs more places to hide and more ways to travel. Cardboard is especially annoying because it has seams and layers that can shelter pests without making the problem obvious.
Less stuff in the room makes the inspection safer and simpler. If your hands are full of extra gear, your attention gets split and that is when items get set on the bed, tossed on a chair or carried back out without checking them.
Know what you’re looking for before you touch anything
A lot of panic starts with misidentification. A speck of lint, a carpet beetle shell or an old stain can send you into full disaster mode if you do not know what bed bug evidence looks like. Before you strip the bed or open drawers, get the visual target clear in your mind.
What bed bugs look like at different stages
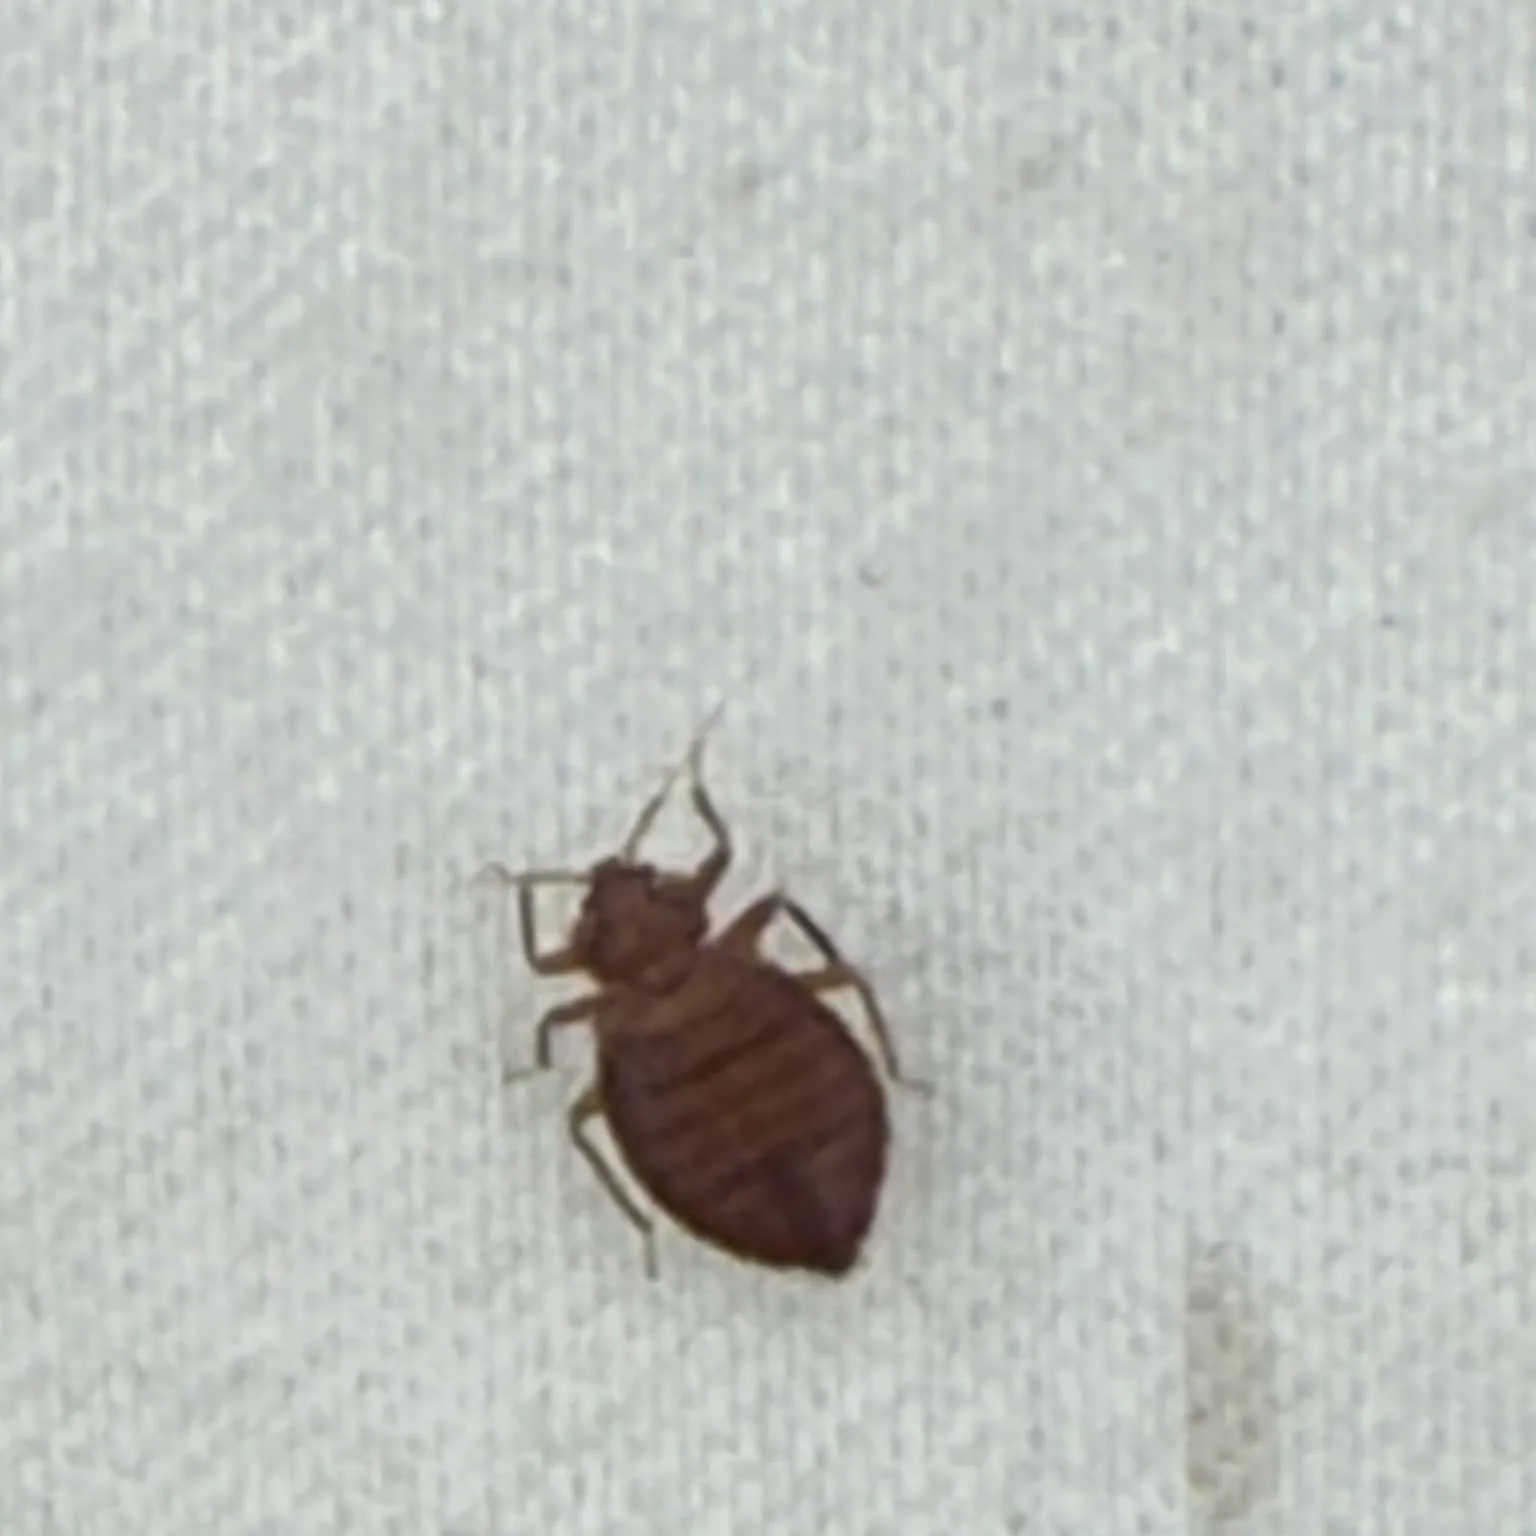
Adult bed bugs are flat, oval and reddish-brown. Unfed adults are roughly apple-seed sized, about 5 to 7 mm long, which is close to 1/4 inch. After feeding, the body looks a little longer and more swollen. Younger bed bugs, called nymphs, are much smaller and lighter. Early-stage nymphs can look pale yellow or almost translucent, which makes them harder to spot against light fabric.
Eggs are tiny, pale and tucked into cracks or seams. Think of something closer to a grain of salt than anything dramatic. According to adult size details, adults are usually about 5 to 7 mm long when not engorged, which gives you a useful reference point when comparing a real insect to a photo online.
The signs that matter most
Live bugs matter, of course, but you often find the leftovers first. The most useful evidence includes shed skins, black or brown fecal spots, tiny eggs and light blood smears on sheets or pillowcases. In a heavier infestation, you may notice a sweet, musty odor, though that is usually not the first sign in a small or early problem.
Bites are not enough to confirm bed bugs. Plenty of skin reactions look similar, and some people do not react right away. Pest professionals say bites were the most common reported sign, but reported does not mean reliable for identification. Physical evidence beats skin symptoms every time. If you need help sorting that part out, it helps to compare your findings against clear visual clues to check before panicking.
Common lookalikes that confuse people
Fleas jump. Ticks usually stay attached when feeding. Carpet beetles are more rounded and patterned, and the larvae look fuzzy. Bat bugs and bird bugs can look almost identical to bed bugs without magnification, which matters if bats or nesting birds are nearby.
Misidentification is common enough that 84% of pest professionals said initial reports often pointed to another pest first. So if you find one bug and you are not sure, save it. Do not crush it into mystery dust and move on.
Step 1: Isolate the suspected area before you inspect
Containment starts before the first sheet comes off the bed. If you keep walking in and out, set things down in the hallway, and change rooms mid-inspection, you raise the odds of spreading bugs more than you raise the odds of finding them.
Limit traffic in and out of the room
- Close the room off as much as possible before starting.
- Keep pets, kids and unnecessary foot traffic out.
- Plan to finish the inspection in one session if you can.
The point is simple: fewer exits mean fewer opportunities for a bug to hitch a ride on clothing, laundry or an item in your hand. Massachusetts guidance recommends isolating the area as much as possible once bed bugs are suspected, and that advice is worth following at home too.
Dress for inspection and plan your exit
- Wear simple clothes with minimal layers.
- Avoid loose cardigans, robes or anything with lots of folds.
- Choose clothing that can go straight into a hot dryer afterward.
- Keep a sealable bag ready for what you are wearing when you finish.
Long, drapey clothing is like giving bed bugs extra handles. Fitted, washable basics are better. When the inspection is done, bag the clothes immediately or take them straight to the dryer. Do not sit on the couch first. Do not carry them into the bedroom hamper. Finish cleanly.
Set up a clean zone outside the room
- Pick one hard-surfaced spot outside the room.
- Place your clean tools, spare bags and hard-sided bin there.
- Return only inspected or sealed items to that zone.
A bathroom floor, hallway corner or entry area works well. Think of it as a landing pad. Anything uninspected stays in the room. Anything inspected and contained can move out. That simple divide keeps the process from turning into a blurry mess.
Step 2: Strip and contain bedding the safe way
Bedding is often the first place people start, and also the first place people accidentally fling bugs across the room. The trick is slow movement and inward folding, like wrapping up a crumbly pastry without scattering flakes everywhere.
Remove bedding in a controlled order
- Start with pillows and top blankets.
- Fold each item inward so the used side stays contained.
- Move to the flat sheet, then the fitted sheet.
- Remove the mattress protector last.
Do not yank sheets off the corners. Lift, fold and compress gently. Bed bugs and eggs can cling to seams and fabric folds, and rough handling can drop them onto the floor or frame.
Bag, seal and label laundry immediately
- Put each batch of bedding straight into a sturdy bag.
- Seal the bag before leaving the room.
- Label it if you are separating pillows, sheets or covers.
- Move it directly to the washer and dryer area.
Do not park the bag in the hallway while you inspect more. Wash what can be washed, then dry on high heat. If something cannot be washed safely, drying on high heat first is often the more useful step for containment.
Inspect pillow seams and mattress covers as you go
- Check pillow piping, zipper lines and labels.
- Look along mattress protector seams and corners.
- Photograph or tape-lift anything suspicious before bagging.
Early evidence often shows up where fabric layers overlap. You are looking for dark dots, shed skins, tiny pale eggs and live insects tucked along stitching. If bites are your only clue so far, a deeper guide on what to check when skin signs show up first can help you keep the search focused.
Step 3: Inspect the mattress carefully without dragging it around
Dragging a mattress into the hallway is a classic panic move, and it creates a bigger risk than benefit. Inspect the mattress where it is, with controlled lifting and a seam-by-seam approach.
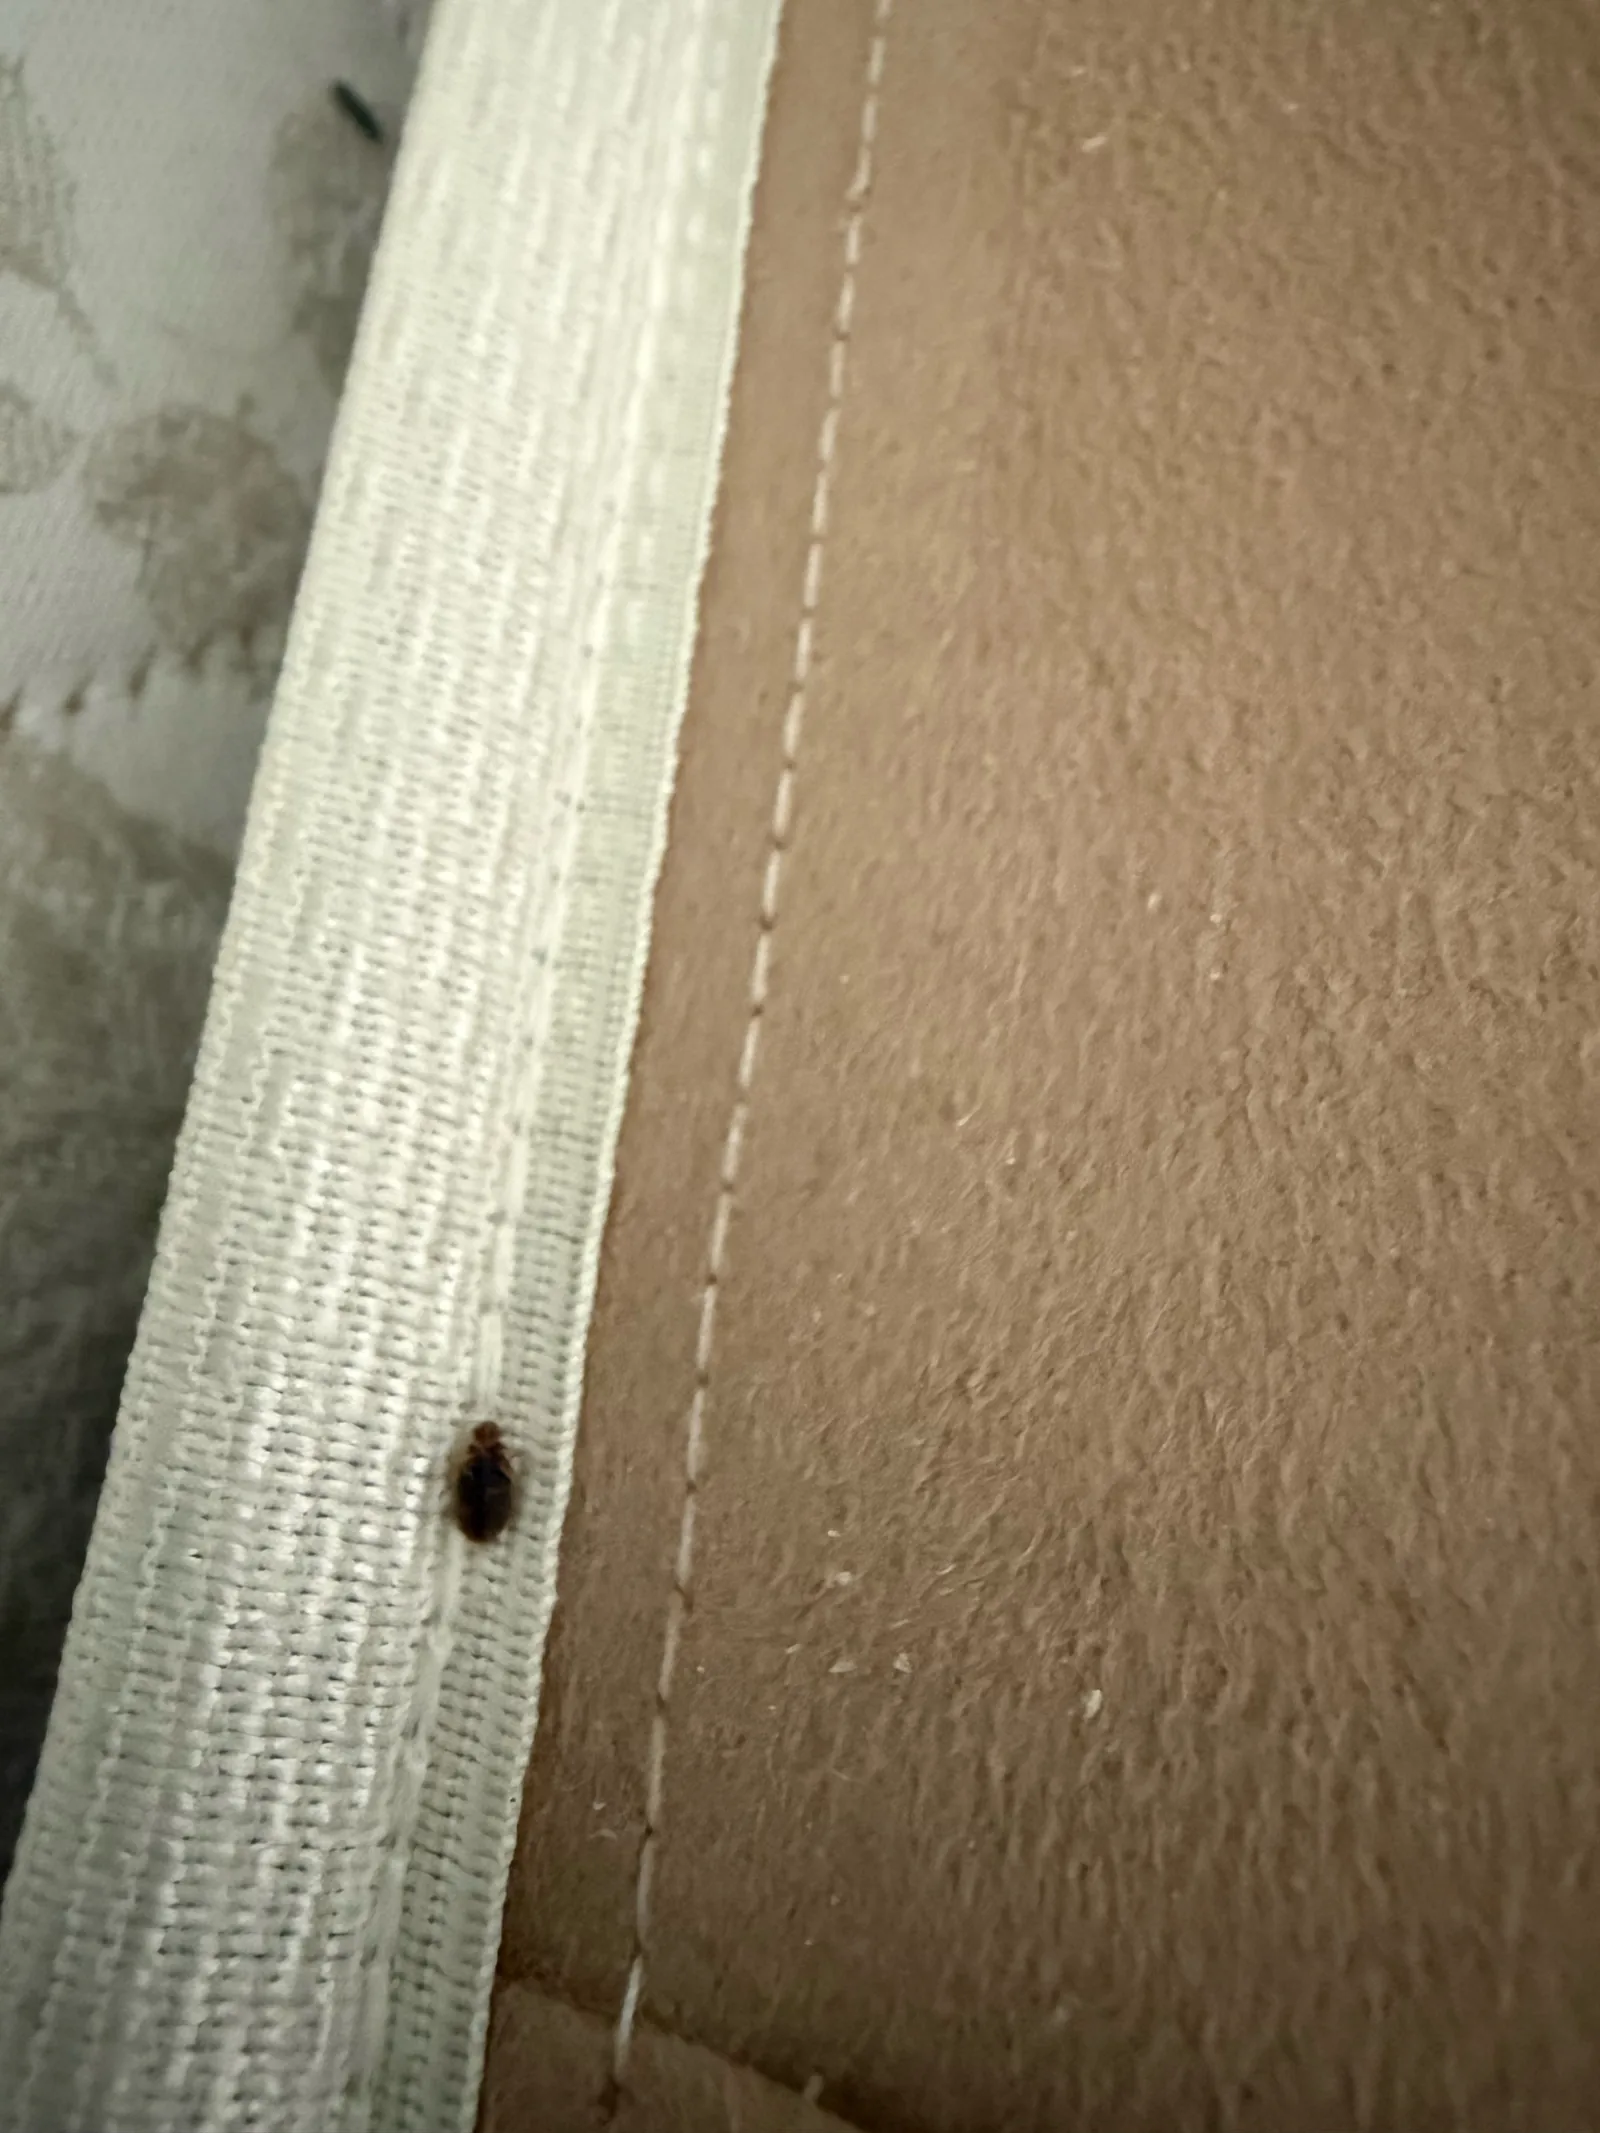
Check the top piping, seams, tufts and labels
- Shine the flashlight slowly along the top piping.
- Use the thin card to open seams and tufts.
- Check labels and handles closely.
- Pause at any dark spot to see whether it is ink, dirt or fecal spotting.
Bed bugs can hatch small enough to fit through stitch holes, so the seams deserve real attention. According to stitch-hole size guidance, young bed bugs can fit into tiny openings you would normally ignore.
Lift the mattress just enough to inspect the sides and underside
- Lift one side slowly, only as much as needed to see the edge.
- Inspect the side seam and underside border.
- Lower it carefully before moving to the next side.
- Avoid leaning the mattress on a wall or another piece of furniture.
Keeping contact points limited matters. If you prop the mattress against a wall, you create a new hiding surface and another place to transfer bugs.
Photograph and bag any evidence you find
- Take a close photo first.
- Take a second photo showing the item’s location on the mattress.
- Use clear tape or a small sealed bag to collect a sample.
- Label the sample with date and location.
A photo of a suspicious insect means much more when it is paired with context, like “mattress seam, lower left corner, near headboard, 10:30 p.m.” Good documentation makes the next step much easier, especially if you wind up getting a professional inspection and treatment opinion.
Step 4: Check the box spring or foundation, especially the underside
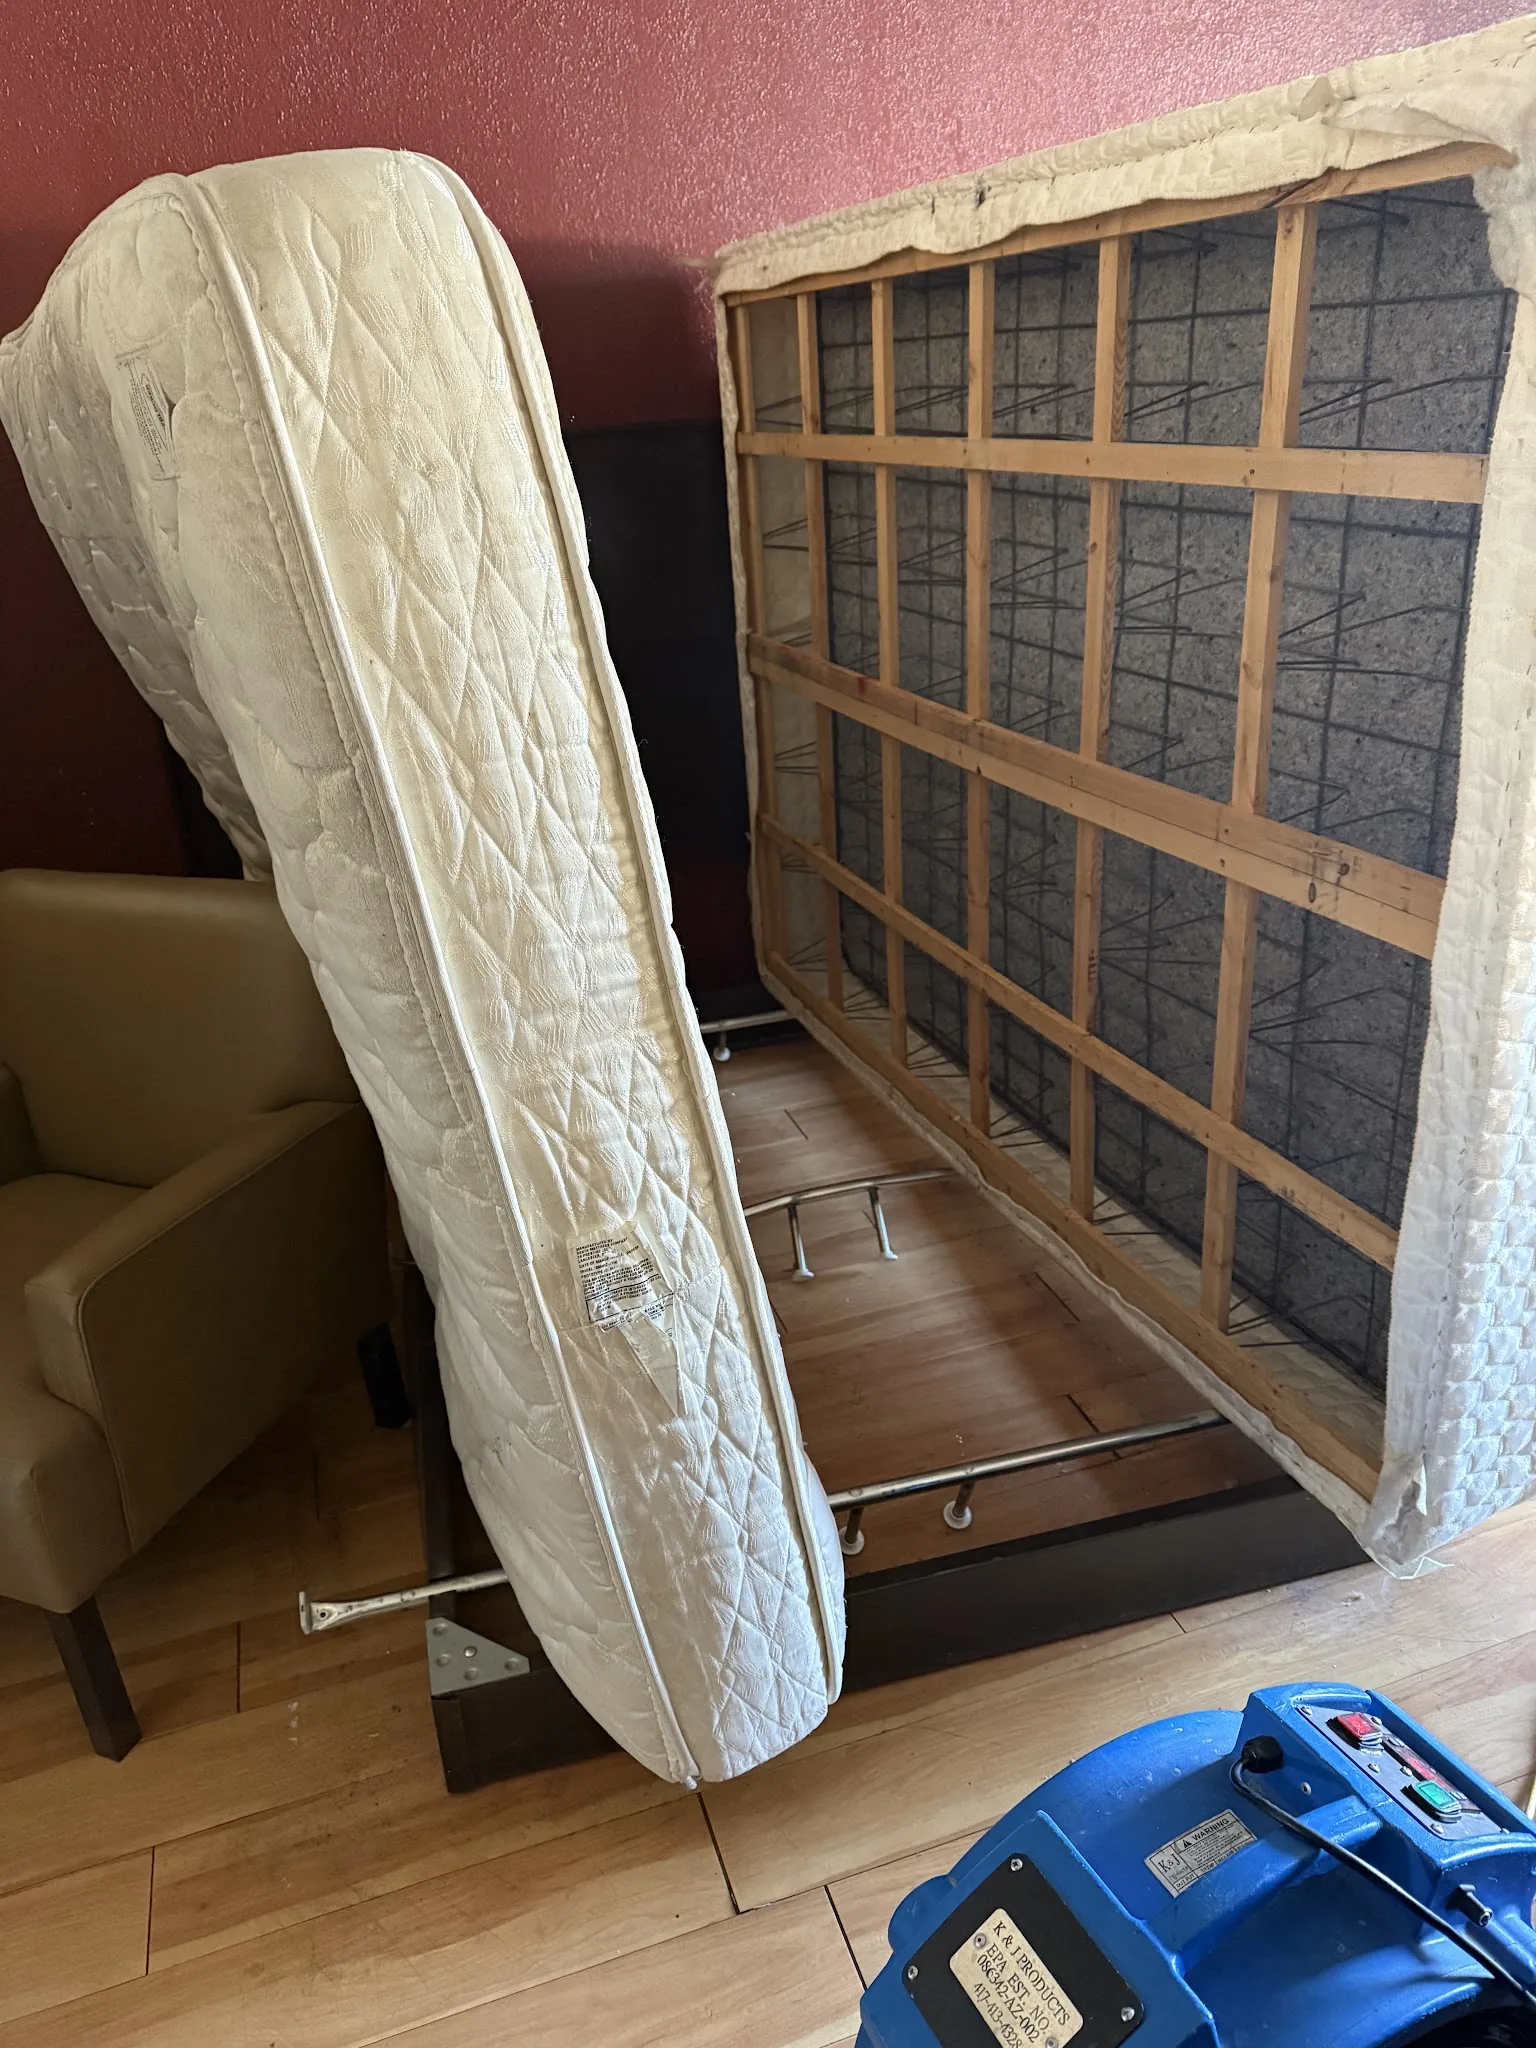
This is one of the biggest hiding zones and one of the easiest places to skip because it feels awkward. Do not skip it. Bed bugs often gather where fabric, staples, wood and shadow come together.
Inspect the corners, seams and plastic corner guards
- Check each outer corner with the flashlight.
- Look along seams, staple lines and plastic guards.
- Note any clusters of dark spotting or shed skins.
Corners matter because they stay undisturbed and protected. A quick glance is not enough here. Slow down and inspect edge by edge.
Look under the dust cover without ripping everything apart
- Turn attention to any tears or loose areas in the underside fabric.
- Peek into accessible gaps with the flashlight.
- Use a card or tool to open a flap slightly if needed.
- Stop short of tearing the cover wide open.
You want information, not destruction. If there is already a gap, use it. If the dust cover is intact and tightly attached, do not turn the box spring into confetti chasing one possible speck.
Examine the internal frame if access is easy
- Check visible slats, support rails and joints.
- Inspect recessed corners where wood pieces meet.
- Stop if access requires major dismantling or rough handling.
A deeper look is useful when there is already evidence nearby. But if getting farther in means flipping, dragging or breaking parts loose, that is where a controlled inspection should stop.
Step 5: Inspect the bed frame, headboard and all joints
Flat open surfaces are not the main attraction. Cracks, screw holes, recessed hardware and tight joints are. If the mattress is the stage, the frame is the backstage area where the hiding usually gets better.
Focus on screw holes, joints and recessed hardware
- Check every connection point on the frame.
- Shine light into screw holes and bracket recesses.
- Look along wooden rails, metal joints and slat ends.
- Use the card to probe narrow cracks gently.
Bed bugs prefer protected spaces over exposed ones. That is why the frame often reveals more than the center of the mattress.
Check behind and inside the headboard
- Inspect the back edge of the headboard.
- Check any wall contact points and mounting brackets.
- Look inside decorative grooves, trim and carved details.
Headboards sit inches from where you sleep and often stay untouched for years. That makes them perfect shelter. In many rooms, the best clue is hiding right there behind the bed, not in the sheets.
Disassemble only as much as you can reassemble safely
- Remove only the pieces you need for access.
- Keep hardware in one container.
- Stop before the room turns into a parts pile.
Partial disassembly can reveal a lot, especially inside bed rail joints and headboard brackets. But if you cannot put the frame back together right away, you risk creating more surfaces to inspect later and more places for bugs to move.
Step 6: Expand the search to furniture within a few feet of the bed
Once the bed has been checked, move outward. Bed bugs tend to stay close to sleeping areas first, then spread farther as the infestation grows. The first few feet around the bed matter more than the far corner closet.
Inspect nightstands, dressers and drawer joints
- Check undersides, back panels and drawer tracks.
- Look inside screw heads, joints and recessed handles.
- Remove drawers one at a time and inspect corners.
Dark furniture seams can hide a lot. A nightstand drawer that sits six inches from the bed is a more likely hiding place than a random shelf across the room. State guidance often recommends inspecting within 20 feet of sleeping or resting areas, but start with the closest items first.
Check upholstered chairs, benches and couches
- Inspect cushion seams and zippers.
- Check welting, stapled dust covers and underside fabric.
- Look at the frame underneath and around the legs.
Any place where you nap, read, scroll on your phone or sit still for a while deserves attention. Upholstered furniture is full of folds and hidden attachment points, which bed bugs love.
Don’t skip lamps, clocks and items on the nightstand
- Check lamp bases, especially felt bottoms.
- Look near cord openings and battery compartments.
- Inspect clutter that sits directly beside the bed.
This surprises people, but bed bugs can hide in small portable items too, including inside bedside lamps. That does not mean every object is infested. It means clutter near the bed should not get a free pass.
Step 7: Inspect the room edges and hidden cracks
If the infestation is more established, bed bugs often work outward into the edges of the room. This is where the inspection gets less obvious and a little more tedious, but the tiny seams really do matter.
Look along baseboards, carpet edges and floor-wall seams
- Follow the baseboards with your flashlight.
- Check corners, cracks and carpet edges.
- Look for spotting, shed skins and live bugs tucked into narrow lines.
You are not looking for bugs marching across the floor in broad daylight. You are looking for signs in the protected gaps where flooring meets trim.
Check behind pictures, mirrors and loose wallpaper
- Inspect wall hangings near the bed first.
- Lift carefully and look at the back edges.
- Check peeling wallpaper, cracks and loose wall seams.
Sheltered vertical surfaces can become secondary hiding spots, especially close to the head of the bed. If the room has decorative frames above the bed, those are worth checking before you start opening every closet in the house.
Inspect outlets, switch plates and curtain areas carefully
- Shine light around outlet and switch plate edges.
- Inspect curtain hems, pleats and the rod area.
- Check window trim and nearby wall cracks.
- Avoid opening electrical fixtures or doing anything unsafe.
Bed bugs can hide in tiny crevices, including outlets and wall gaps. A careful visual check is useful. Taking apart electrical areas without the right precautions is not.
Step 8: Check soft items and personal belongings without scattering bugs
This is the step where containment can fall apart if you start tossing things from pile to pile. Keep the same rule throughout: inspect in place, bag suspicious items immediately and avoid moving soft goods around uncovered.
Inspect laundry piles, hampers and clothing near the bed
- Check clothes left on the floor, chairs or bed.
- Inspect cuffs, pockets, seams and folds.
- Bag worn clothing from the area for laundering.
Clothing that has been near the sleeping area deserves more attention than clean clothes sealed in a dresser across the room. Bed bugs are hitchhikers. A sweatshirt dropped beside the bed for three nights is a better candidate than a neatly stored winter coat in another closet.
Check bags, backpacks and luggage
- Inspect seams, zippers, handles and inner corners.
- Turn pockets inside out if possible.
- Bag or isolate the item after checking it.
Travel bags deserve a careful look, especially if the problem started after a trip or after bringing in secondhand furniture. For a broader checklist, it helps to understand the signs that point to bed bugs in the home, not just on the bed itself.
Review books, electronics and small clutter near the bed
- Sort nearby clutter into inspect, bag and leave-alone groups.
- Flip through books lightly and inspect spines and covers.
- Check remotes, alarm clocks, chargers and docking stations.
The point is not to panic over every paperback. The point is to reduce hidden crevices and stop giving bugs dozens of tiny shelters inches from where you sleep.
Step 9: Use monitors or traps if the visual inspection is unclear
Sometimes you do a careful search and still come up with mixed signals. Maybe you found suspicious spots but no bug. Maybe you have recurring bites but no visual proof. That is when monitors can help.
Place interceptors under bed and furniture legs
- Place interceptor cups under each bed leg.
- Add them under nearby upholstered furniture if practical.
- Pull the bed slightly away from the wall.
- Keep bedding from touching the floor.
Interceptors catch bugs moving to and from the bed. Penn State notes that combining visual checks with interceptor cups raises detection far more than visual inspection alone.
Consider a follow-up inspection schedule
- Recheck the bed and headboard after a few days.
- Inspect again after one to two weeks.
- Review monitors each time and document any changes.
Timing matters because bed bugs do not always reveal themselves on one pass. A low-level infestation can stay hidden if your first search misses the one seam or one furniture joint where activity is clustered.
Know the limits of DIY monitoring
- Treat empty interceptors as useful but not conclusive.
- Keep looking for physical evidence elsewhere.
- Use monitoring as support, not proof of absence.
Even a good inspection can miss a very light population. Illinois guidance says finding no bed bugs does not prove there are none, especially when populations are small or the inspection misses a key hiding spot.
Step 10: Handle vacuuming with care, or skip it during inspection
Vacuuming feels productive, which is exactly why it causes trouble. If you vacuum too early or empty the machine carelessly, you can turn your vacuum into a shuttle bus for bugs and eggs.
When vacuuming helps
- Vacuum only after documenting visible evidence.
- Limit use to exposed bugs, cast skins or accessible seams.
- Avoid broad, casual vacuuming during the inspection itself.
Vacuuming can help remove visible material, but it is not the first move. Inspection comes first, evidence second, careful removal third.
How to empty and seal the vacuum safely
- Empty the canister directly into a sealable bag, or remove and seal the vacuum bag.
- Close that bag immediately.
- Clean attachments before moving the vacuum elsewhere.
- Store or empty the vacuum outdoors if possible.
If you cannot do all of that right away, skip the vacuum for now. A slow inspection with tape and bags is safer than a rushed cleanup.
Why sweeping and casual brushing can make things worse
- Avoid sweeping suspicious debris across the floor.
- Do not brush seams or furniture with bare hands or a cloth.
- Keep movements slow and deliberate.
Quick cleanup scatters debris into cracks and onto clothing. It also destroys evidence that could have told you where the main activity really is.
Step 11: Collect, label and document what you find
A vague memory like “there were some spots near the bed” is not very useful a day later. Clear photos, sealed samples and simple notes make the inspection count.
How to capture a specimen safely
- Use clear tape, a zip-top bag or a pill bottle with a tight lid.
- Collect the sample gently without crushing it flat.
- Label the container with date and location.
Massachusetts recommends collecting the specimen and recording where it was found. That is smart because confirmation matters, especially if bat bugs or another lookalike are possible.
What photos to take
- Take a close-up of the bug, skin, egg or spotting.
- Take a medium shot showing the exact seam, crack or item.
- Take a wider shot showing where that item sits in the room.
Those wider context shots save time later. If you wind up comparing rooms, treatment zones or repeat inspections, you will be glad you have more than one blurry close-up.
Keep a simple inspection log
- Write down every location checked.
- Note what signs were found, if any.
- Record what was bagged, laundered or isolated.
- Track dates of follow-up inspections and monitor checks.
This does not need to look like a police report. A notes app entry is fine. What matters is turning stress into something organized and usable. If your concern is still mostly skin reactions, it may help to compare those signs with a clearer guide to what bites can look like.
Step 12: Decide what to do right after the inspection
The inspection ends, but the next hour matters. Good next moves keep the situation contained. Panic moves tend to spread bugs, waste money or both.
What to do if you found clear bed bug evidence
- Keep the bed and nearby items where they are.
- Leave bagged laundry sealed until wash and dry time.
- Reduce clutter carefully, one contained item at a time.
- Set interceptors if you have them.
- Arrange for confirmation or treatment promptly.
Do not start hauling the mattress outside at midnight. If you found clustered evidence near sleeping areas, the useful part is that you now know what problem you are dealing with.
What to do if you found signs but no live bugs
- Save samples and photos.
- Set interceptors under the bed legs.
- Reinspect the bed, frame and nearby furniture on schedule.
- Keep suspicious items contained.
Mixed signs happen. Young bugs are small, adults hide well and not every pass catches the live insect itself. You are looking for a pattern, not a dramatic movie scene.
What not to do next
- Do not sleep in another room if you can avoid it.
- Do not move furniture to other parts of the house.
- Do not spray random products into seams and outlets.
- Do not keep shifting laundry from one pile to another.
Sleeping elsewhere can pull bed bugs into a new room. Dragging furniture around spreads risk. Spraying the wrong product in the wrong place can scatter bugs deeper into hiding and make later control harder.
Troubleshooting common inspection problems
Even a careful inspection can get messy fast, especially when you are tired, grossed out or trying to do this at 10:30 at night with a flashlight in one hand. A few common snags show up again and again.
You found bites but no physical evidence
Bites alone do not confirm bed bugs. Skin reactions can come from mosquitoes, fleas, allergic irritation or something else entirely. Recheck the mattress seams, headboard, bed frame joints and nearby upholstered furniture first, because those areas are the highest-yield spots.
If you are sorting out skin clues, a side-by-side guide to how these marks differ from mosquito bites can help keep you from chasing the wrong pest.
The room is cluttered and hard to inspect safely
Use four categories: inspect now, bag, launder and leave alone for the moment. That keeps you from creating a giant mixed pile in the middle of the room. Clutter makes inspection less reliable because every extra object adds another seam, fold or shadow line to check.
Handle one zone at a time. Bedside floor first, then nightstand, then chair, then dresser. Slow beats chaotic every single time.
You found one bug and are not sure it’s a bed bug
Save the sample immediately. Do not rely on memory or one quick phone photo from too far away. Look at the shape, color, size and where it was found. A flat reddish-brown bug in a mattress seam means something very different from a tiny jumping insect on the floor.
If bats or birds have been in the attic, chimney or wall voids, species confirmation matters even more because bat bugs and bird bugs can look very similar.
You live in an apartment, duplex or shared building
Shared walls and neighboring units matter. If you find evidence, document it and report it quickly. Keep infested or suspicious items contained and avoid moving them through hallways, elevators or shared laundry rooms uncovered.
Bed bugs are common in apartments and condos, which is one reason early reporting matters so much in shared buildings.
You suspect the bugs came from travel or secondhand furniture
Start with luggage, recent laundry and any recently brought-in furniture or soft items. Check zippers, seams, handles, underside fabric and hidden joints. Travel and used furniture are classic introduction routes.
That does not mean every room is infested. Trace the most likely source first, then inspect outward from the places where those items were set down or used.
What results to expect and what to try next
A careful inspection can tell you a lot, but not everything. It can confirm obvious activity, narrow down likely hiding zones, and help you avoid spreading bugs while you figure out treatment. What it cannot do is magically guarantee there is no problem if the first search comes up empty.
If the inspection confirms bed bugs
Clustered evidence near the bed, especially live bugs, fecal spotting, shed skins and repeated findings around seams and joints, usually means the problem is real. That is bad news, sure, but it is also useful news. Now you can target the right problem instead of treating every itch, stain and speck like an emergency.
The next move is a treatment plan, not a panic purge.
If the inspection is inconclusive
An inconclusive result usually means one of two things: the population is very small, or the hiding place was missed. Use interceptors, repeat the inspection, save anything suspicious and stay organized. A second pass often works better because you know the room layout and the likely hot spots by then.
The key is not to declare victory too early just because you did not spot a live adult on the first try.
Your next best move today
Tonight, inspect one mattress seam and the headboard area with a bright flashlight. If you find anything suspicious, tape it, bag it, label it and stop there. One calm, contained check beats ten panicked laps through the house.
When to Hand the Inspection to a Pro
If your own search comes up empty but the bites continue, our technicians inspect homes across Richmond, Henrico and Chesterfield, as well as the Charlottesville area. We check the same places this guide covers, plus wall voids and furniture joints that are hard to reach yourself. Learn more about our bed bug inspections.
Frequently Asked Questions
How long does a home bed bug inspection usually take?
A careful inspection of one bedroom often takes 30 minutes to 2 hours, depending on clutter, furniture and how detailed you need to get. More furniture, more fabric and more hiding spots mean more time.
Can you inspect for bed bugs without getting bitten?
Yes. Wear simple washable clothes, limit contact with upholstered items, and bag or heat-dry your inspection clothing right after you finish. Bites usually are not the main risk during inspection anyway. Carrying bugs out on clothing or belongings is the bigger concern.
Should you throw away your mattress if you find bed bugs?
Not as a first move. A mattress can often stay in place while you confirm the infestation and plan treatment. Throwing it out too early can spread bugs through the home or building, and it often does not solve the actual problem if the frame, headboard or nearby furniture is also infested.
What is the first place to check for bed bugs?
Start with the mattress seams, piping, tags and the headboard area. After that, move to the box spring or foundation, bed frame joints and nearby furniture within a few feet of the bed.
Can bed bugs be in a room even if you do not see any live bugs?
Yes. Eggs, fecal spots, shed skins and blood smears can show up before you see a live insect. Bed bugs hide deeply in cracks and can survive for months without feeding, so an empty-looking room is not automatically a clear room.
Is it safe to vacuum during a bed bug inspection?
Only if you can empty and seal the vacuum contents immediately and clean the attachments before the vacuum leaves the area. Otherwise, skip vacuuming during the inspection and focus on finding and documenting evidence first.